Rules design concepts for Other periods

>> Friday 30 October 2009

Now that several of my club rule sets are up on this website (Thank you Andy/Count belisarius) - I feel I need to put some of my thoughts on rule writing on this Forum.

I started writing rules for the club when we found we didnt much like the available sets for Medieval skirmish. And we had figures needing killing! I had started a long time ago with Retinue rules, but had lost interest in them due to the quirks inherent in the system. (An example being the best way to hit a particular figure at long range was to aim at the guy next to him! )
I had no computer at the time, so I ran up a Retinue-esque set of rules on my old Brother typewriter.
Half a bottle of Tippex later, I had a fairly useable set to use.

As time went by, I got a scanner and laptop and scanned the rules into Word.
What a mess, it would have been easier to type it all in again!!!
Version 3 - now on the website - still has something of that original typed set in it.
I have gradually written rules for most of the periods we do at Tyneside Wargames club, and yes--there have been some sincerely duff ones along the way --but we are happy for now with what we have I think. At least for now!

In the last year or so, I have changed the style of Skirmish rules I write, as I wanted a set where you could be a single guy on the table, and all the rest of the battle went on around you. Of course, once the French and Indian rules went live, there turned out to be not many uncommanded figures out there! - Wargamers are all control freaks to some extent obviously!
The way it plays is that you dice for all the units on the table on a chart, and dependant on their situation, they act in the directed way. Players have a command rating and may attempt to control units. These units then ignore the charts orders unless things are going too badly and/or your dice rolling is awful!
I used to have casualties taken in the same chart but this rather overtaxed the system so I took it out. Also, it is part of the fun of the game to throw 'To Hit' dice.

As time has gone by, my rule systems have evolved somewhat. At first I designed for opposed games, but I am a solo player at heart, so most of my systems evolved to be played solo as an option.

Generally, I am rather loathe to make the sets as full of explanations and pictures as most commercial sets unless people really want it! - I always feel these things are best kept seperate so they can be laid aside when you are playing. This can make learning the systems harder though as I am aware. in the club I am always on hand to explain things, but people picking the rules up to use cold may find the concepts difficult to grasp.

I have found, especially recently,too many sets seem to make it hard to find the rules in a sea of explanations in my opinion. However, rule writing is individual in taste, and I am sure my club rules will only appeal to a certain proportion of gamers.

If you download any of my sets, and feel they need changes or additions to the rules to make them easier to understand I will be really happy to try and oblige!

As ever - happy gaming! - And seriously, dont feel obliged to like my rules! - they are only up there to give you more choice - and they are free!!!

Enjoy!--- Herkybird

PS: This link takes you to the club forum, where more information can be found onthis subject
http://tynesidewargame.6.forumer.com/viewforum.php?f=5&sid=6aa99839fe4b17afa5a064035e0f6954

Read more...

New Rules for Download - Medieval Skirmish

>> Wednesday 28 October 2009

I've just added Richard's (Herkybird) Medieval Skirmish Rules to the Downloads page here.

Let us know what you think!

Andy

Read more...

A Day at Tyneside Wargames club

This is a quick overview of a typical Saturday morning at the club. Its the same day we had the Medieval skirmish game featured in my last Blog entry.

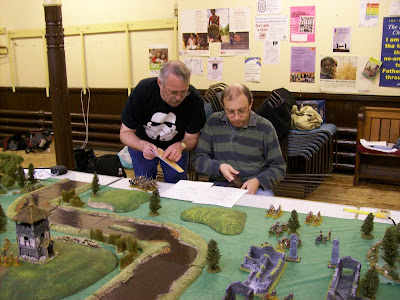
This dreadful picture is me trying to make up my mind on how to stop my Norman archers getting shot. Either that or I have something in my eye!


A Wings of War: Dawn of WW2 game. Me109s sparring with two Spitfires. Great game!


An Ancient Cavalry wing about to roll up the opposition! (Great Captains rules)


The Napoleonic (Empire rules) lads, working out how to fight in a wood. Either that or Jed has his finger stuck on an upturned bayonet!


Darn it! - these figures all look the same!


Johnny Reb rules ACW game. Like all rules its tough to find the answer to any query until you stop looking for it! - just look at the concentration on those faces!


That Napoleonic game in full swing! -- players declaring their evil intentions to the opposition!
Its a good general (excuse the pun) rule that you don't need to beat the enemy army, just the general of the said army!


Pete Foggin (Club secretary) trying to decide if his coffee is safe behind that militia! - those enemy light cavalry look mighty threatening!

Phil - one of our newest (and most welcome!) members finding out from Ian how good his Vikings are not!


The Club is pretty easy going usually, though some rule sets definitely provoke more discussion than others!.

We are always happy to see new faces - don't be frightened to pop in if you are in Newcastle upon Tyne.

Happy Gaming!

Herkybird

Read more...

Battle Report: 16th October 2009-10-20

>> Thursday 22 October 2009

Situation:


1073 A.D. An Anglo Norman force, with some local Saxon Fyrd is defending a river against a Viking raiding force. The terrain is dominated by a watchtower which overlooks a ruined village destroyed in the northern revolt.

Dispositions:

The Normans took the left, facing a lightly armed raider force. The Fyrd took the right against the Viking main force. Light archers lead both armies.


The Engagement:

The Vikings split their forces, the archers moved to engage the Fyrd archers defending the riverbank. The Norman archers fell back to the watchtower (screened by a party of Monks!) as they were being outflanked on their left by fierce Vikings!

In front of the watchtower, the battle fizzled out as neither side really attempted to engage. The Vikings were worried they would be ambushed and the Saxons did not feel strong enough to attack!


The Fyrd archers, however, held wonderfully well, causing much damage before breaking in the face of Viking swordsmen crossing the River.

The Viking raiders on their right flank pushed to try and outflank the Normans.

Fortunately, the Normans had left an ambush of axemen on that flank in a clump of trees who rushed out to stem the Viking advance. The rest of the Normans, seeing this, went to support them, and forded the river.


The Viking raiders were attempting to take an important hill on the Normans flank but were surprised by the Norman axemen. The Vikings were driven from the hill before they re-established their line, this put the axemen in danger of being surrounded by the greater number of Viking raiders.

At this point, the Norman knights came charging over the hill followed by their spearmen. The knights smashed through the Viking front line, but caused little damage, and soon were fighting for their lives in the middle of a swarm of raiders. Two knights were subsequently lost before the Norman spearmen joined the battle and began to win the engagement.

At this point, the Vikings, having taken many more casualties than the Anglo-Normans decided to pull off while they had sufficient strength to resist any pursuit. The loss of 2 Norman knights cannot have upset the Fyrd unduly!!! - though the Normans would have been mortified.

Read more...

  © Blogger templates Inspiration by Ourblogtemplates.com 2008

Back to TOP